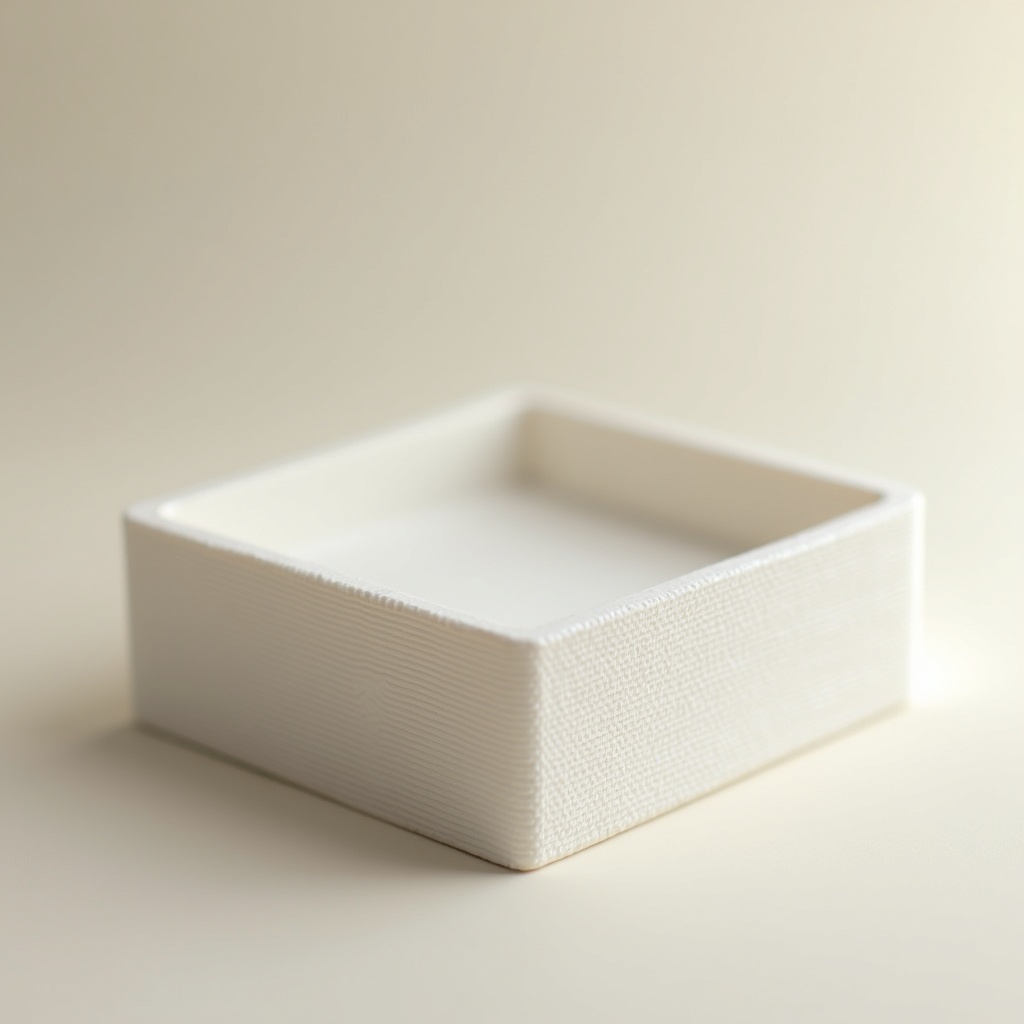
Print #6 — The mini storage tray: going bigger, fighting warping
You've mastered small prints. Time to scale up.
You've mastered small prints. Time to scale up.
The storage tray is your first large, flat print — and with size comes a new enemy: warping. The corners lift. The base curves. The print detaches mid-way. This is not a failure; it's physics. And there are straightforward ways to beat it.
Why large flat prints warp:
PLA shrinks very slightly as it cools. With small prints, this is imperceptible. With large flat prints, the outer perimeters cool faster than the center — creating internal stress that pulls corners upward. The bigger the print, the stronger the effect.
Your anti-warp toolkit:
1. The brim:** A flat ring of filament printed around your object, 5–10mm wide. It adds surface area in contact with the bed, anchoring corners during cooling. Remove it with a flat tool after printing — it snaps off cleanly on PLA. **This is your first line of defense.
2. First layer slow-down: Set your first layer speed to 20–25mm/s. A slow, well-laid first layer sticks better to the bed.
3. Bed temperature: PLA: 55–65°C. Don't let it cool mid-print. If your printer has a temperature drop between layers, check your bed settings.
4. Draft shield: Some slicers offer this — a thin wall printed around your object to contain heat. Useful in cold rooms.
Designing a tray:
If you want to model your own (recommended): a tray is just a rectangular box without a lid. In Tinkercad:
1. Place a large box (e.g. 120×80×30mm)
2. Hollow it out: place an identical box 2mm smaller on each side and 3mm shorter, then subtract
3. Round the corners (optional but nicer to the touch)
4. Export and print
Recommended settings:
- Layer height: 0.2mm
- Infill: 15%
- Walls: 3 perimeters
- Brim: 8mm
- Bed temp: 60°C
- First layer speed: 25mm/s
What can go wrong:
- *Corner lifting mid-print:* pause, apply glue stick to corners, resume. Or restart with a wider brim.
- *Print detaches completely:* bed too cold or not clean. Wipe with isopropyl alcohol and retry.
- *Brim won't come off cleanly:* let the print cool completely before removing. Use a thin spatula.
Why this print matters:
The storage tray completes Level 1. You now know how to diagnose dimensional issues (cube), personalize designs (keychain), manage hollow objects (pencil cup), work with tolerances (cap), nail a first layer (coaster), and handle warping (tray). That's a complete foundation.
Ready to layer up? → Print #7: Gridfinity: When 3D Printing Becomes a System