Print #14 — The broken furniture leg: your first reverse engineering job
Title: Print #14 — The Broken Furniture Leg: Your First Reverse Engineering Job
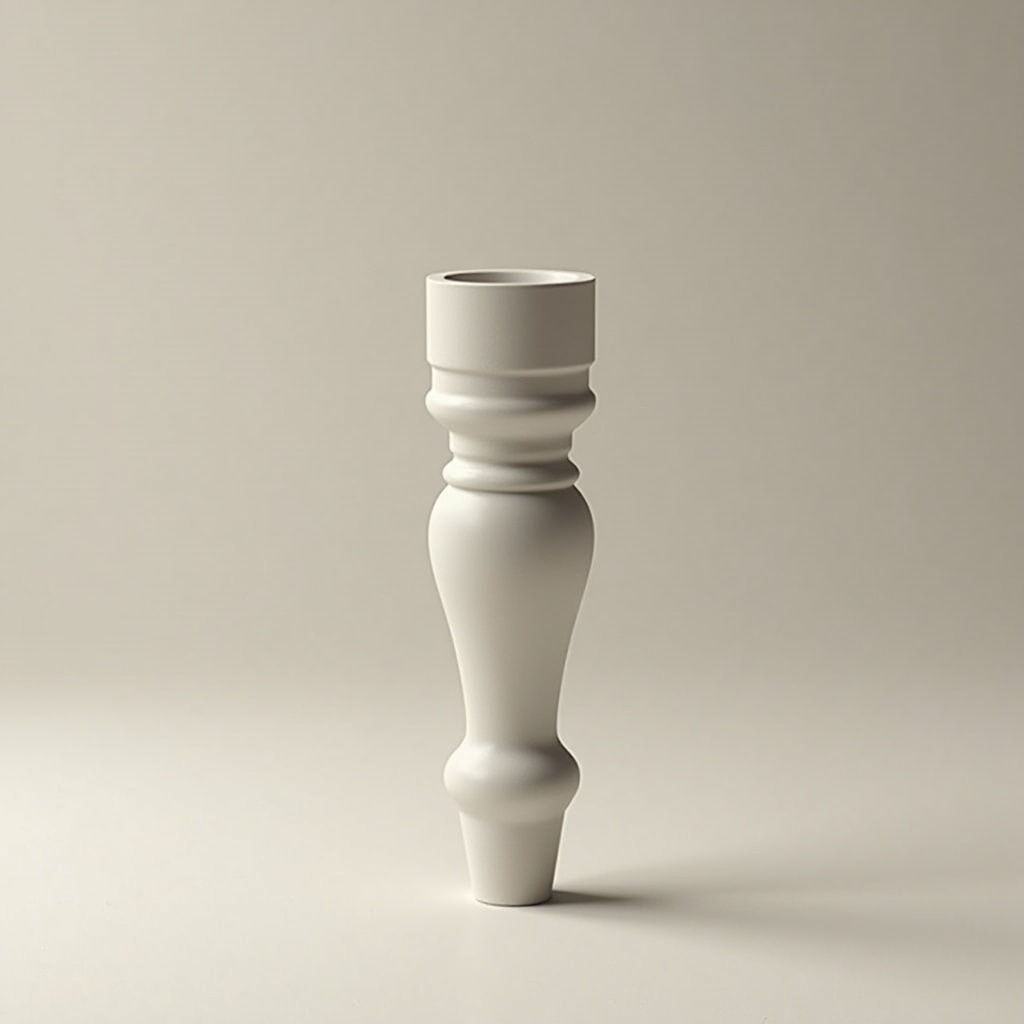
A chair wobbles. A table tilts. A shelf is missing a foot.
The replacement part costs €40 online, takes 3 weeks to arrive, and might not even fit your exact model anymore.
Or: you spend 45 minutes measuring, 3 hours printing, and €0.30 of filament — and the repair is indistinguishable from the original.
Welcome to Level 3: you don't just print things. You replace things.
Why PETG instead of PLA for this job: A furniture leg is a structural part. It carries real load — a chair leg supports 20–40kg under dynamic conditions (sitting, shifting weight). PLA is fine for static loads, but it:
- Creeps under sustained pressure (slowly deforms over weeks/months)
- Becomes brittle in warm rooms or near heat sources
- Has lower impact resistance than PETG
PETG is the right material here. It's stiffer under sustained load, handles higher temperatures, and absorbs impact better. The downside: it's slightly harder to print (more oozing, needs different temperature settings).
PETG key settings:
- Nozzle temp: 230–245°C (hotter than PLA)
- Bed temp: 70–85°C
- Print speed: 40–50mm/s (slower than PLA to reduce stringing)
- Cooling: less fan than PLA (50–70%) — PETG bonds better with reduced cooling
- Retraction: tune carefully — PETG strings easily (try 4–6mm retraction at 45mm/s for Bowden, 1–2mm for direct drive)
The reverse engineering process — step by step:
Step 1: Identify what you have
- Is the broken leg a simple shape (cylinder, cone, cube) or complex?
- Does it have a mounting mechanism (threaded insert, clip, glued bracket)?
- Take photos from all angles before you disassemble anything
Step 2: Measure with calipers Calipers (pied à coulisse) are the most important tool for Level 3+. Buy a basic digital caliper for €10–15. You need:
- Outer diameter (OD): measure across the widest point
- Inner diameter (ID): for hollow legs or tube sections
- Total height: measure with depth probe if the leg is recessed
- Mounting hole diameter and depth: critical for fit
- Thread pitch: if the leg screws in, count threads per cm
Step 3: Find or design a model
- Search Printables/Thingiverse with exact dimensions: "furniture leg 35mm diameter 80mm tall"
- If nothing matches: use OpenSCAD or Fusion 360 to model it from scratch (just cylinders and rectangles for most legs)
- If it has a threaded base: there are parametric thread generators online — use the "ISO metric thread" OpenSCAD library
Step 4: Print a test before committing Print 30% of the leg height first. Remove it. Test the mounting mechanism. Does it click in? Does the thread engage? Adjust if needed before printing the full part.
Recommended settings:
- Layer height: 0.2mm
- Infill: 40% minimum, 60% for legs under heavy load
- Walls: 4–5 perimeters
- Supports: use if the leg has overhangs, set to 45° threshold
- Orientation: print the leg vertical for strength along its axis, or horizontal if the base plate needs to be strong
What can go wrong:
- PETG strings between moves: tune retraction and slightly lower nozzle temperature. Clean strings after print with a heat gun (quick pass) or tweezers
- Replacement leg doesn't fit mounting hole: remeasure carefully — you may have measured OD when you needed the recess diameter. Add 0.2–0.3mm clearance to the mount dimension
- Leg cracks under load: not enough infill or walls — 60% infill + 5 walls for anything supporting body weight
The mindset shift: Before Level 3, you were printing things that exist. Now you're analyzing, measuring, and replicating. Every broken plastic part in your home is now a candidate for repair. Drawer guides, appliance clips, shelf brackets — the methodology is the same.
Ready to layer up? → Print #15: The Drawer Handle: When Plastic Meets Metal